Easy English Muffins
Super easy and great to do with the kid(s). You will prepare and shape the dough in the afternoon (after your kid(s) get out of school), allow to proof over night in the refrigerator, and bake in the morning.
This recipe makes 12 muffins
TOOLS OF THE TRADE
Scale
Stand Mixer (this is a wet dough so I wouldn’t advise mixing by hand)
BPA free plastic tub with top (at least 6 qts) or you can use a glass bowl with plastic wrap
2 baking trays
Skillet
INGREDIENTS
16.25 ounces AP flour (~3.25 cups)
1 tablespoon of rapid rise yeast (instant yeast)
2 teaspoons of salt
1 cup whole milk (room temperature
1/2 cup of water (rooms temperature)
2 tablespoons unsalted butter (melted)
1 tablespoon sugar
6 tablespoons of cornmeal
DIRECTIONS
Mix flour, yeast and salt together in the bowl of a stand mixer. Mix milk, water, melted butter and sugar together until sugar dissolves.
With dough hook on slow speed (setting 1 on the stand mixer) gradually add the liquid to the flour mixture. Mix for approximately 2 minutes until a cohesive dough has formed (no dry flour remaining). Scrape down the bowl as needed.
Increase the speed to medium low (setting 2 on the stand mixer) and knead dough for about another 8 minutes (the dough should be smooth and elastic and clears the sides of the bowl, but still sticks to the bottom).
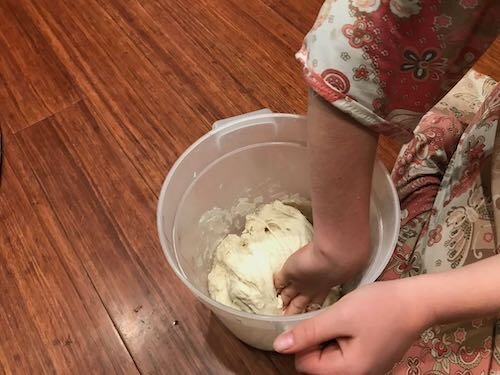
Transfer the dough to a lightly greased BPA free tub (or bowl) and cover. Let it rise for 30 minutes.
Using a wet hand fold the dough over itself (see images below). Turn the tub 90 degrees and repeat (repeat 2 more times for a total of 4 folds). Cover tightly and let dough rise for 30 - 60 minutes until the dough has doubled in size.
Sprinkle have the cornmeal over the baking sheet. Press down on dough to deflate and transfer to a well floured surface. Divide the dough into quarters and each quarter into thirds (each piece should weigh 2.5 ounces). Cover loosely with greased plastic.
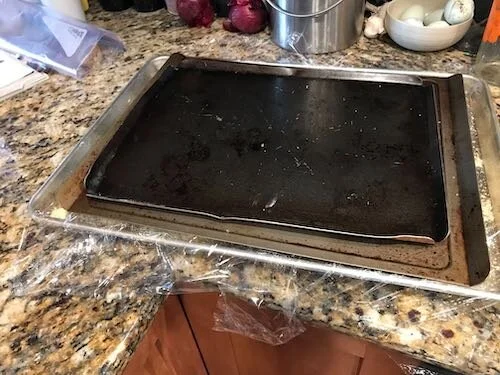
Working with 1 piece of dough at a time shape it into a ball by stretching the dough and folding it underneath. This should result in a crude shaped ball that is smooth on top (see images). On an un-floured surface place the ball seam side down and drag in small circles using your cupped hand (see images). Do this until the dough feels taught and round. Place the dough ball, seam side down, on the baking tray (the one that has corn meal on it). Repeat with the remaining dough balls and place 2” apart on the tray. Cover loosely with greased plastic and gently place the second baking sheet on top. If you have different size baking sheets, like I do, make sure all the dough balls are covered.
Let the dough balls rest for 30 minutes and then place them in the refrigerator for at least 12 hours and up to 24 hours.
When ready to bake, take the proofed muffins from the refrigerator, remove the top baking sheet, loosen the plastic and let them sit for 1 hour at room temperature. Sprinkle the muffins with the remaining corn meal and press gently to adhere.
Preheat the oven to 350 degrees with the oven rack in the lower to middle position. Heat the skillet over medium high heat for 2 minutes. Gently place 4 muffins onto the skillet (you will work with 4 muffins at a time) and cooked until well puffed and lightly browned, 3-5 minutes per side (keep an eye on them as they can go from lightly browned to darkly browned quickly). Do not press down on the muffins.
Transfer muffins to a baking sheet and cook for 10 minutes. Repeat with the remaining 2 batches (adjusting burner temperature as needed).
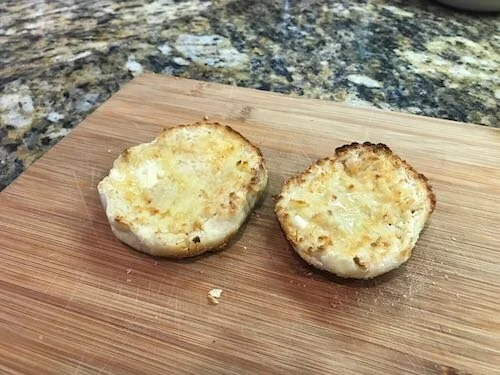
Transfer muffins to a rack and let cool for 15 minutes. To split them open, work your way around the outside of the muffin with a fork (see image). You don’t need to actually split them apart until they are ready for toasting
If you decide to freeze some of them, do the initial split, wrap in tin foil, put in plastic bag and freeze.